News
In pursuit of perfection
Tweet
Our goal as a manufacturer is to produce fire detection and alarm systems that are fault free whenever equipment leaves the Pertronic Industries manufacturing plant.
But given that there are often hundreds of individual components interconnectedly packed into printed circuit boards (PCBs), this is a challenging task.
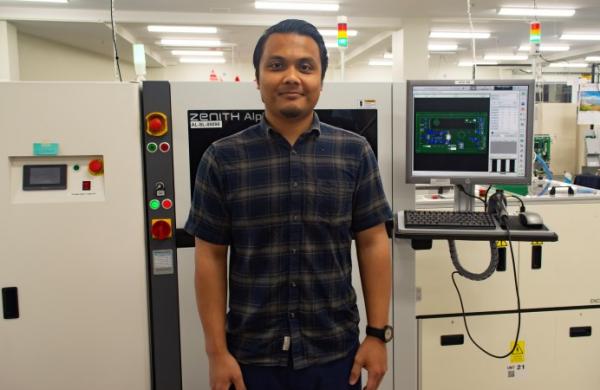
The same compactness, and justifiable human limitations in being able to repeatedly view and detect flaws on a board, is a major reason a Kohyoung Zenith Alpha Automatic Optical Inspection (AOI) unit is strategically located at the end of both our Surface Mount Technology lines.
Human eye visual inspection can’t spot minute imperfections in a densely crowded board.
“But AOI can, repeatedly and consistently, and has the capability to do the visual inspection consistently and repeatedly” says Muin Abdul Wahab, the AOI Operator.

Pertronic Industries' Automatic Optical Inspection machine in action
He says the AOI unit has a file containing a reference (and perfect) 3D images and angles of specific sites across a circuit board.
The AOI unit can be programmed using source files provided by the engineer that includes the components placement file and the Gerber file that stores the shape and location data for each of the placements.
“The AOI checks the actual board with what has been deemed a fit for purpose board,” he says.
By using an actual board and the mapping program, AOI will capture the 2D and 3D images that allows the AOI to be program to detect defects on the board by following the IPC Class 3 Standard.
The AOI system contains a camera equipped with optical lens and the LED light projection. The camera alone will capture the 2D images and further with the help of the light, will be able to capture the 3D images as well. By utilising both, Kohyoung AOI is capable of creating a comprehensive image for inspection.
Using a PCB that is flawless as its reference, the AOI is programmed to detect 10 critical defects for the placement of components including:
- Dimension variation - includes checking the absence of any component
- Rotation
- Bridging (or shorts)
- Lead coplanarity (lifted legs/leads)
- ‘Absence of component’ which verifies nothing is placed on a location that does not require it
- Solder fillet – checking the joint of the component
- Tombstone
- Upside down component
- OCV/OCR which identifies the value of the component against another with the same shape
- Offset which prompt the operator regarding a component placed off-centered.
Inspection time is between five to 30 seconds depending on the size, number of components and the complexity of the components.
As well as flagging a board for repairs, AOI helps improve the assembly path processes.
“AOI helps identify patterns of defects,” he says. “That allows us to adjust our processes before we turn out hundreds of boards.”
AOI comes with its own statistical process control (SPC) that can be used to monitor the production line status in real time. The SPC includes a job and inspection analysis and a detailed review of failure and passing rate for each job down to each of the components used. This helps to capture any failure trend that may appear for a production line.
A 2019 study in the International Journal of Engineering and Advanced Technology reports that catching a fault in a recently assembled board is only 10 times costlier than catching a defect in a bare board. But, finding a fault in a board that has gone on to use in the field is 1,000 times more costly. Those who would like to drill down to the paper can find it here.
Muin says catching errors and flaws early minimises the likelihood of future rework, and makes Pertronic production operations more efficient.
“AOI never gets tired, nor complains about having to carry out a repetitive job,” he says.
“It also means we can use our skilled staff for more important tasks...helping to ensure that all the products that leave Pertronic are as flawless as they can possibly be.”
 CLICK to CALL US NOW
